


Shower wall panels provide a stylish and cheaper alternative to ceramic tiles when renovating a bathroom or shower area. For the D.I.Y. enthusiast, panels are easier and much quicker to install than traditional tiles as they do not require the assistance of a specialist tiler. Panels also have the advantage of being easily replaced if the householder wants to change with the design.
Why Choose Panels Rather than Tiles?
Traditionally, bathrooms and shower areas have been tiled to prevent water from seeping into the walls. Shower panels, which can also be used on other areas of the bathroom walls, allows for a more rapid and cost-effective method of replacing existing tiles that may have become damaged or no longer attractive to the house occupants. A competent D.I.Y. person will be able to undertake the process of replacing existing tiles with wall panels using just a few tools and accessories. The work can be completed in around one-sixth of the time required to install tiles.
The main benefits of installing panels are due to the speed of installation, the lower cost and the avoidance of having to employ a specialist tiler to install ceramic tiles. Panels are also easier to maintain, requiring just a ‘wipe-over’ as there are no grout lines to be scrubbed to remove ingrained dirt. Due to their low maintenance and easy to clean design, these panels are frequently used throughout changing rooms in sports centres and arenas.
Preparation
If possible, ‘condition’ the panels by leaving them in the bathroom for a couple of days before installation. Thoroughly clean the panels using an anti-bacterial liquid.
If necessary, remove the existing tiles from the area to be the site of the panels. In some cases, this is not necessary as the panels can be fitted ‘over’ the existing tiles on the wall. There is a small range of tools that will be required to successfully install the panels.
These items are:
Caulking gun
Safety goggles
Tape measure
Sharp blade/Craft Knife
Electric, fine tooth saw
Adhesive
Sandpaper
Foam tape
Sealant
Process
- Measure the area accurately to ensure that the panels will fit, provide a 3mm gap between the panels to be filled with silicone sealant. Always measure several times before cutting as you can only cut once.
- Lay the panel flat on supports with its face up.
- Mark any cutting lines on the panel, place masking tape over the areas to be cut to protect the panel.
- Use the saw to cut the panels to size then sand the edges to remove any loose material. Turn the panel over and use the sandpaper to rough up the surface around the area of the joint. This will provide a ‘key’ that will allow the neutral cure adhesive to form a stronger bond.
- Check that the walls are clean and free of any debris or contaminant.
- Apply at least three strips of foam tape to the rear of the panel.
- Remove any protective film or covering from the panels before adhesive application:
- Apply a thin line of adhesive down either side of the panel
- Create a Z or zig-zag pattern from the top to the bottom to provide full coverage
- Make circles of adhesive to ensure full and even coverage
- Remove the backing from the foam tape
- Installation
Always start from the corner, keep the panel at an angle to prevent the adhesive and the foam-backed tape from sticking before the panel is located in the correct position. At this point, some panels may be joined using ‘tongue and groove’ jointing strips while others will need to be sealed with a silicone sealer.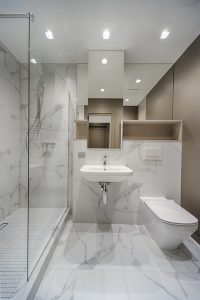
Once the first panel is successfully installed it will be easy to align the rest to it. To obtain the correct 3mm gap between panels, tilers pegs can be used when there is no jointing strip. The gap should be filled with a neutral cure silicone sealer.
Final Thoughts
Shower panels provide a quick and inexpensive way of upgrading a bathroom without skimping on quality. The benefit of panels over tiles is that any proficient D.I.Y. enthusiast will be able to successfully undertake such a project, while a tiled bathroom will most likely require the assistance of a professional tiler, at a high cost.
Many of the panel manufacturers either provide a fitting kit with their products or have one available for sale at extra cost. These products should be used to get the best results. The use of quality silicon products, such as neutral cure silicone, when installing the panels will reduce the danger of invalidating the manufacturers’ warranty on the panels.
Add Comment